How to Roast Coffee Beans in a Pan?
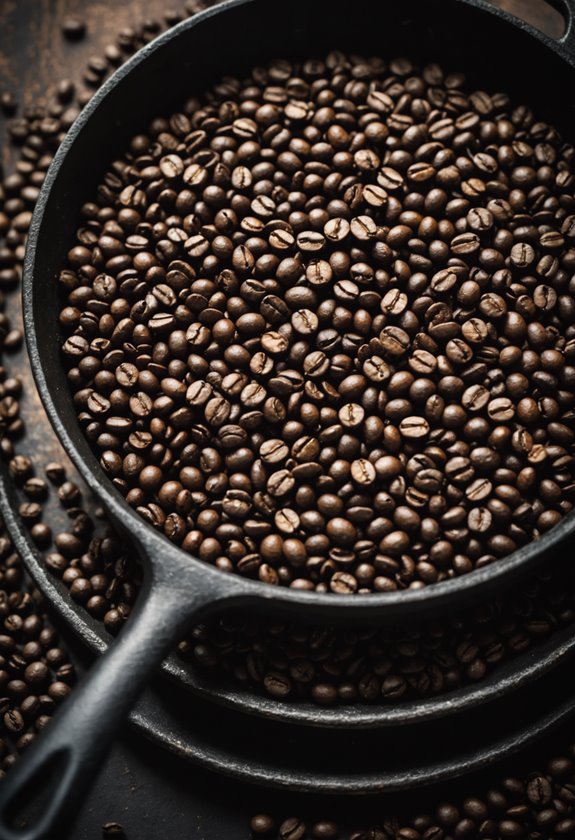
Roasting coffee beans in a pan at home is straightforward and rewarding. Start by placing a heavy-bottomed cast iron skillet or wok on your gas or electric stove, and preheat it to about 500°F. Pour in ¾ to 1 cup of green coffee beans, stirring every minute with a wooden spoon to guarantee even roasting. Listen for the first crack at 385°F for a light roast, or aim for a second crack at 440°F for a dark roast. Once you reach your desired roast level, quickly transfer the beans to a metal colander and stir to cool. For the freshest flavor, store beans in an airtight jar. With these steps, you'll commence on an expedition to craft your perfect coffee roast.
Key Takeaways
- Use a heavy-bottomed cast iron skillet or wok for even heat distribution.
- Preheat the pan to around 500°F (260°C) before adding coffee beans.
- Stir beans every minute to ensure even roasting and prevent scorching.
- Monitor for the first crack at 385°F (196°C) for light roast.
- Cool beans quickly in a metal colander, stirring to enhance airflow.
Preparing Your Equipment
Begin by selecting a heavy-bottomed cast iron skillet or wok, as these guarantee even heat distribution and help prevent scorching your beans. This guarantees a smooth and consistent roasting process, essential for achieving that perfect cup of coffee. Your chosen pan will become the heart of your roasting setup, so make certain it's sturdy and ready for the task.
Next, gather the necessary tools: a wooden spoon for stirring your green coffee beans, a metal colander for cooling them after roasting, and an infrared thermometer to monitor the pan's temperature. These items will assist you in controlling and perfecting the roasting process. A reliable heat source, like a gas or electric stove, is significant. If you prefer more control, a single-burner Coleman stove could be a great substitute.
For safety and comfort, activate your stovetop exhaust or open windows for proper ventilation, as roasting can produce smoke. Let's investigate how maintaining good airflow is vital for a pleasant experience.
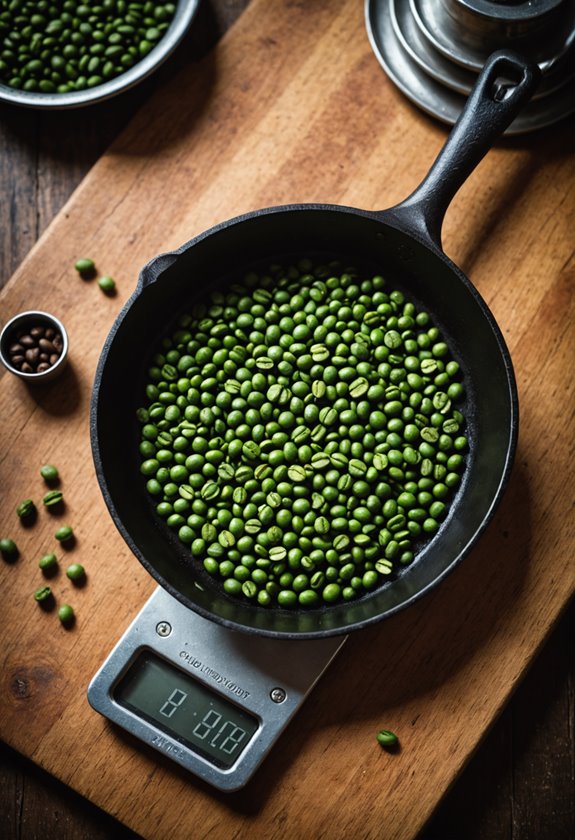
Finally, prepare high-quality green coffee beans, around ¾ cup to 1 cup, to guarantee the best flavor outcome. While popcorn poppers offer another roasting method, pan roasting gives you more control over the process. With these preparations, you're ready to begin your coffee roasting expedition.
Step-by-Step Roasting
With your equipment gathered and ready, it's time to move on to the exciting part: the roasting itself.
Begin by preheating your cast iron pan to around 500°F (260°C). Once the pan is hot, pour in approximately ¾ to 1 cup of unroasted coffee beans. Cover the pan to retain heat, making sure the beans don't burn.
Constantly stir the beans every minute to confirm even roasting and prevent scorching. Keep a close eye on the color changes and listen for the vital first crack, which typically happens around 385°F (196°C). This crack signals that the roasting process is progressing successfully.
Once the beans reach your desired roast level, which usually takes about 8 to 15 minutes, swiftly transfer them to a metal colander. This step is important to cool the beans and stop the roasting process immediately.
Shake the colander to agitate the beans, removing any chaff. Allow them to vent for at least 12 hours, enhancing their fresh roasted aroma before storing them in airtight containers.
Using a pan at home allows you to achieve fresher flavors compared to store-bought roasted coffee beans.
Let's investigate these steps to guarantee you excel in the art of roasting coffee beans in a pan, achieving fresh, aromatic results each time.
Achieving Desired Roast Levels
Mastering the art of achieving your desired roast level is both a science and a craft form. When pan roasting coffee beans, understanding how to reach the perfect roast can enhance your coffee experience.
Proper water temperature remains critical for extracting optimal flavor after roasting your beans.
Start by aiming for the right temperature and timing. A light roast occurs around 6-8 minutes, with the first crack signaling readiness at approximately 385°F (196°C). For a medium roast, extend to 8-10 minutes, listening for the first crack and watching for a slight color change. This medium roast offers a balanced flavor profile, perfect for a well-rounded cup.
To guarantee even roasting and avoid scorching, regular agitation is key. Stir the beans every minute to maintain consistent heat distribution.
Here are some essential tips to achieve your desired roast level:
- Light Roast: Aim for 6-8 minutes, listen for the first crack at 385°F.
- Medium Roast: Roast for 8-10 minutes, observing color change and first crack.
- Dark Roast: Continue for 10-15 minutes, noting the second crack at 440°F.
- Agitation: Stir frequently to guarantee even roasting and prevent scorching.
Don't forget, cooling plays an important role in stabilizing flavors, as noted by Sweet Marias.
Cooling and Storing Beans
As soon as your coffee beans reach the desired roast level, it's important to cool them quickly to halt the cooking process and prevent over-roasting. Immediately transfer the beans to a metal colander or bowl. This facilitates rapid cooling by allowing air to circulate freely around the beans. Stirring them for about 1-2 minutes enhances airflow, guaranteeing even cooling and retaining the roast coffee's best flavor profile.
Cooling and Venting
After the initial cooling, let the beans vent for at least 12 hours. This step is significant as it allows carbon dioxide to escape, which is crucial for proper flavor development. During this time, keep the beans in a well-ventilated area. Avoid sealing them in a container immediately, as trapped gases can affect the taste.
Storing for Freshness
Once the beans have vented, store them in an airtight glass jar. This helps maintain their freshness by protecting them from light, heat, and moisture, which can degrade their quality. Proper storage techniques are essential for preserving the rich flavors and aromas of your freshly roasted beans.
Place the jar in a cool, dark place for ideal preservation. For the best taste and aroma, consume the roasted beans within 1-2 weeks. This guarantees you enjoy the freshest possible coffee.
Let's investigate how these steps enhance your coffee experience!